The app ships with some relatively strict hardware requirements: you’ll need an AMD Ryzen with integrated Radeon graphics, or an 11th Gen Intel Core (Ice Lake) chip or higher. Alternatively, the app will work with virtually any processor with a discrete GPU (AMD RX400 or Nvidia GeForce GTX 1000 or later). Of course, you’ll also need an HDR capable display.
Looking for a worthy HDR display? Check out our guide to the best monitors.
What is HDR, again?
As our primer on HDR on PC explains, high dynamic range content more closely emulates the range of light as it fades from the deepest blacks to the brightest. If you’ve ever watched a dark scene and noticed a faint glow around pitch-black scenes, that’s no HDR HDR essentially tells the screen to make those dark scenes as dark as possible, but to turn up the brightness when necessary. When properly configured, HDR allows for a good upgrade in image quality.
What our explainer describes in more detail can be summarized briefly: HDR works best when the display is capable of high contrast ratios (for the darkest darks) and a high light output (for the brightest ones). This can be achieved in a number of different physical ways. An important tip, though, is your monitor’s HDR rating: an HDR10 or HDR400 monitor may not emit enough light to make HDR really effective, but an HDR1000 monitor will.
There is one other important point: in the Windows 11 Settings menu (System > Display > HDR) Windows should tell you if your monitor is certificate for HDR. This is important as it communicates to the Windows 11 operating system that HDR is enabled. “HDR-certified displays typically perform very well without any additional calibration,” notes Microsoft’s Windows HDR Calibration application page. “However, you should still consider using the Windows HDR Calibration app on your HDR display.”
In other words, if your monitor is certified, it probably already works fine, although the app can tweak it further. If Windows no tell your monitor as certified (even if the box says it is!), the Windows HDR Configuration app is just what you need.
All in all, setting up your HDR display is a simple process, it only takes a few minutes, and there’s even a quick fix if you think you’ve screwed it up.
How to use the Windows HDR Calibration application
Luckily, a vendor recently suggested I evaluate an Innocn display for some testing related to USB-C dongles and Thunderbolt docks. Innocn, a Chinese brand I had never heard of, sent me the Innocn 27M2U, a 27-inch 4K HDR1000 screen. Even though it was factory configured, with an HDR1000 label on the box, Windows does not no tell it as a certified HDR monitor – perfect to set up with this new app.
(One note: for best effect, make sure the display is connected directly to your notebook or desktop, rather than a USB-C dongle or Thunderbolt hub. Although I’ve found that a Thunderbolt-to-USB-C cable direct between my laptop and the screen enabled HDR, routing it through a USB-C DisplayLink dock did not – good for productivity but not for HDR movies or games.)
- Time to complete: 5 minutes
- Tools needed: none
- Materials needed: A Windows 11 PC, an HDR capable monitor, video cables
- Cost: $0
Make sure your screen is HDR enabled and HDR is enabled
Mark Hachman/IDG
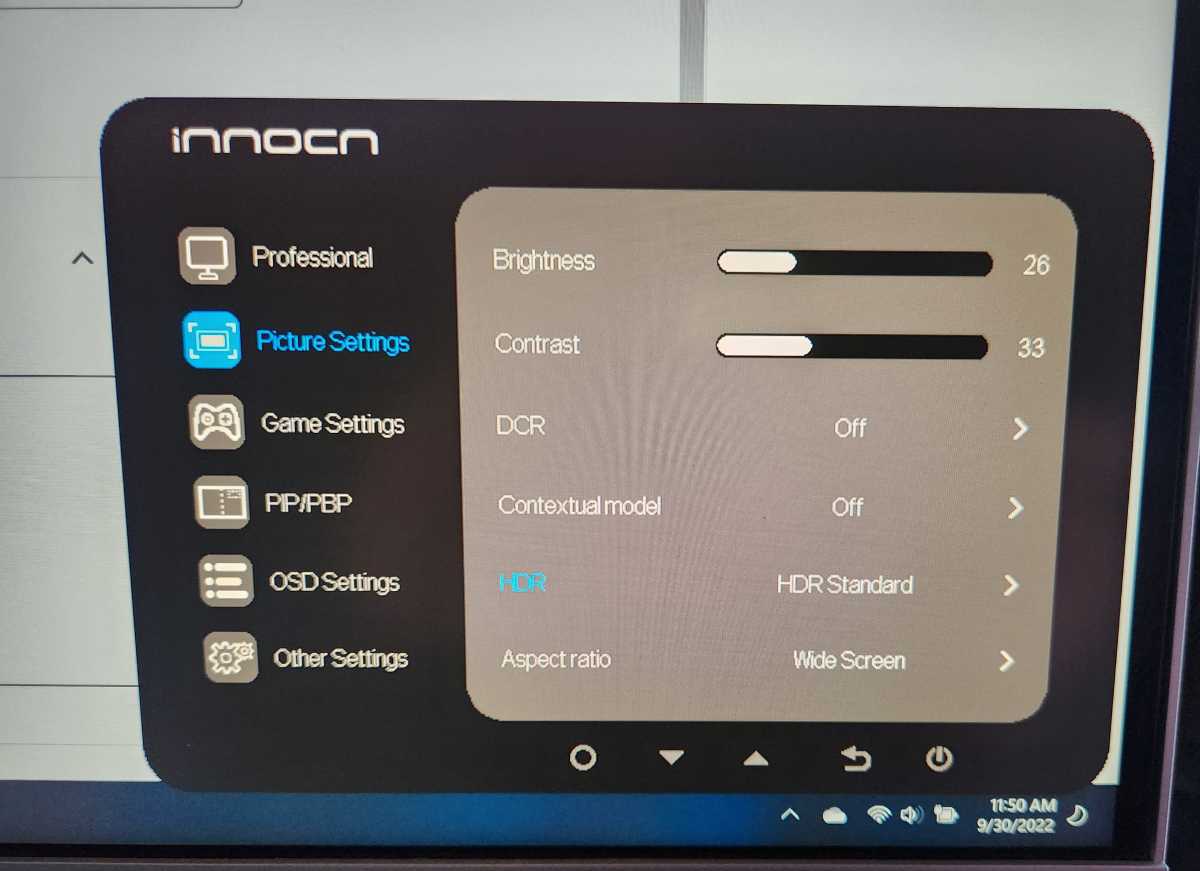
Enabling HDR features on your monitor varies from monitor to monitor, so your best bet is to follow the instructions in your manual. This will almost certainly mean using your monitor’s on-screen display and navigating through some menus.
Your monitor may have more than one HDR option, such as “HDR Design” or “HDR Gaming”. Choose what works for you.
Some of our older HDR400 test monitors developed an ugly bluish cast when HDR was enabled. You can certainly go through the setup process to see if this goes away, although they might not work as well with HDR enabled.
If your monitor also has post-processing effects turned on by default, you can turn them off – or not! Establishing the right HDR “look” for your screen is pretty subjective – pick what works for you.
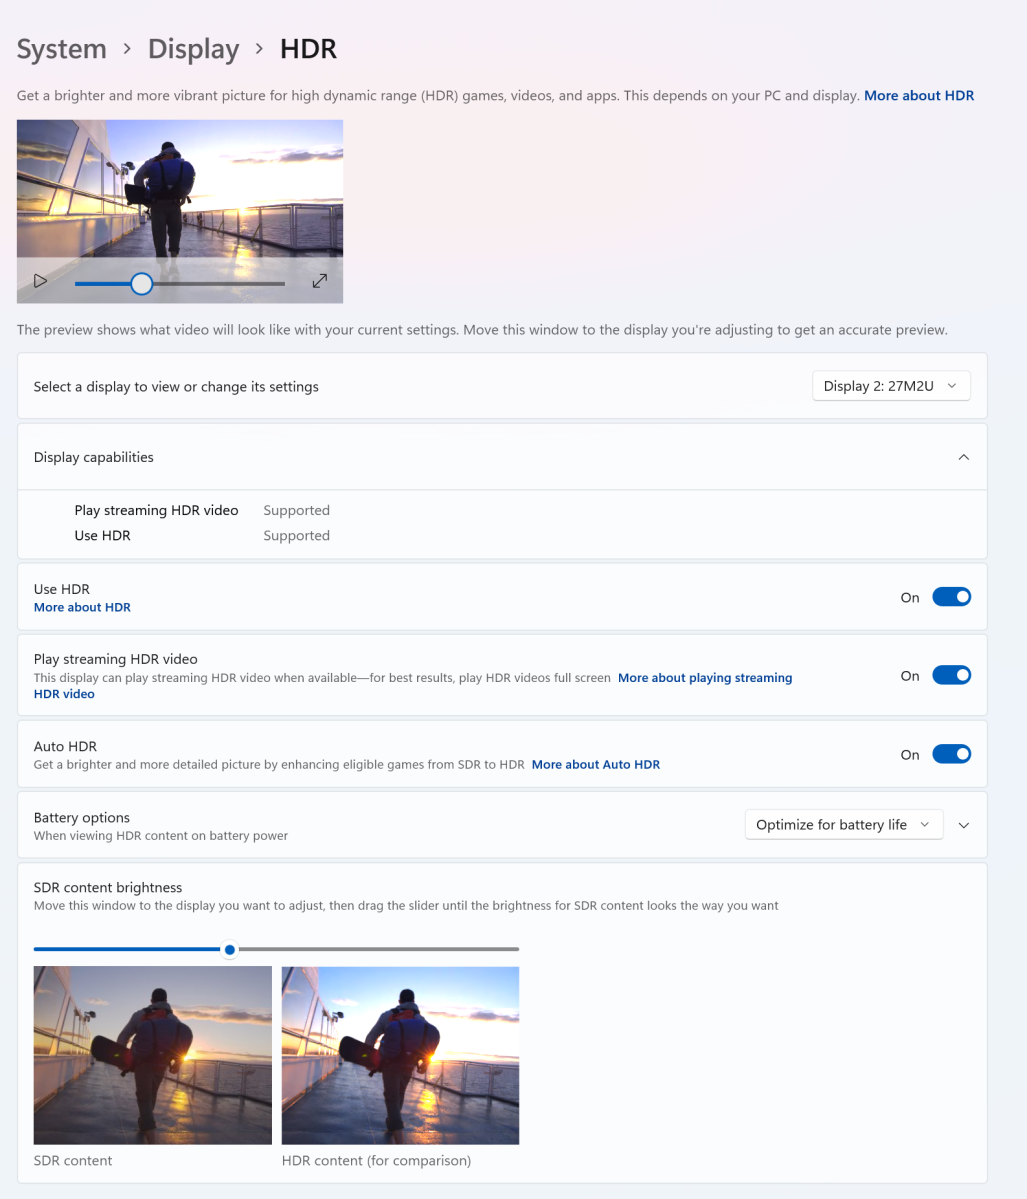
Make sure HDR is enabled for your display in Windows 11
Mark Hachman/IDG
Make sure HDR is enabled in Windows 11 by going to Definitions menu then System > Display > HDR. Make sure you choose the right view!
Make sure HDR is enabled by turning on the appropriate switches. Some choices are up to you – if you’re setting up a laptop display, you might want to turn HDR off to save power if you’re using battery power.
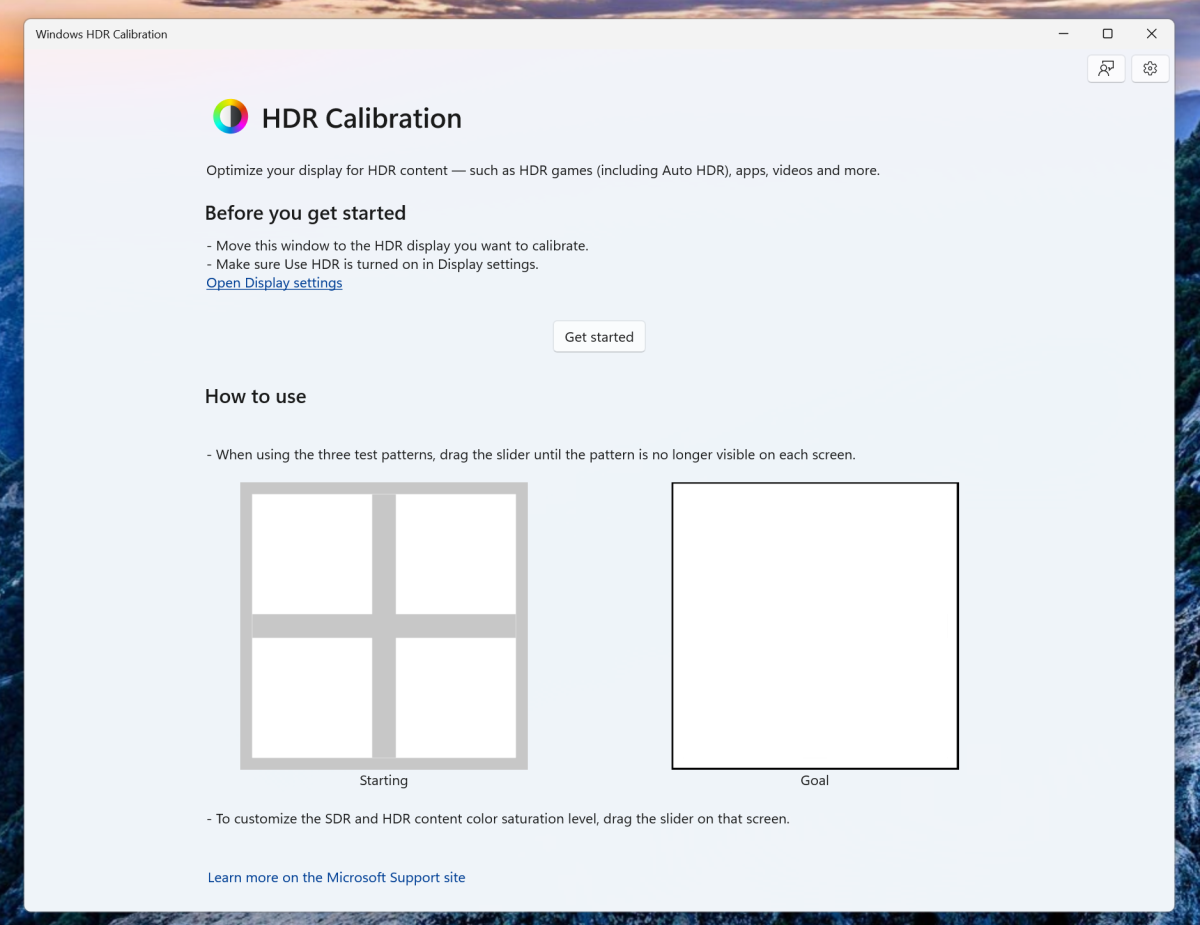
Launch Windows HDR Calibration app on correct screen
Mark Hachman/IDG
Launch the Windows HDR Calibration app and drag it to the screen you want to configure. The app will not work (and notify you of this) if opened on a screen that does not support HDR.
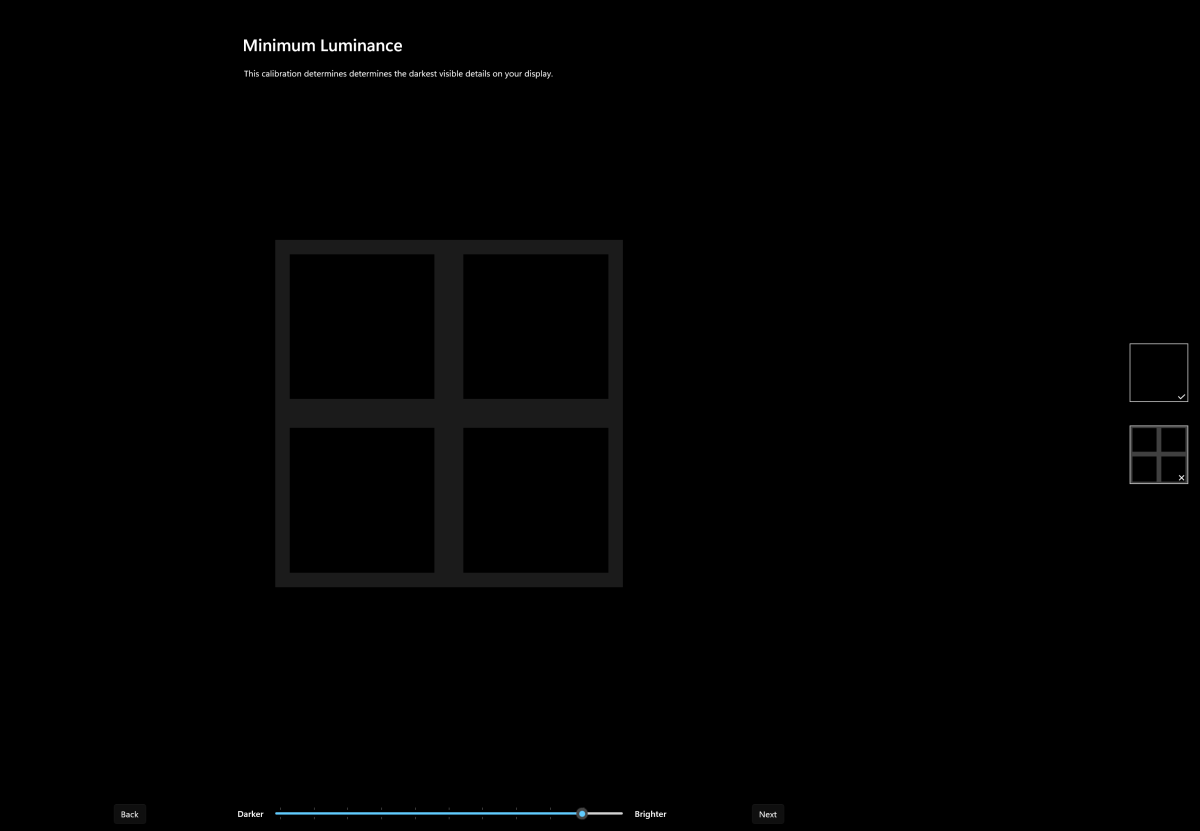
Start stepping through the Windows HDR Configuration app by setting the minimum luminance
Mark Hachman/IDG
The first thing the Windows HDR Configuration app asks you to do is set the minimum brightness. Adjust the slider at the bottom of the screen until the “window pane” icon disappears into darkness, as the icons on the right indicate.
Set the maximum luminance in the Windows HDR Configuration app
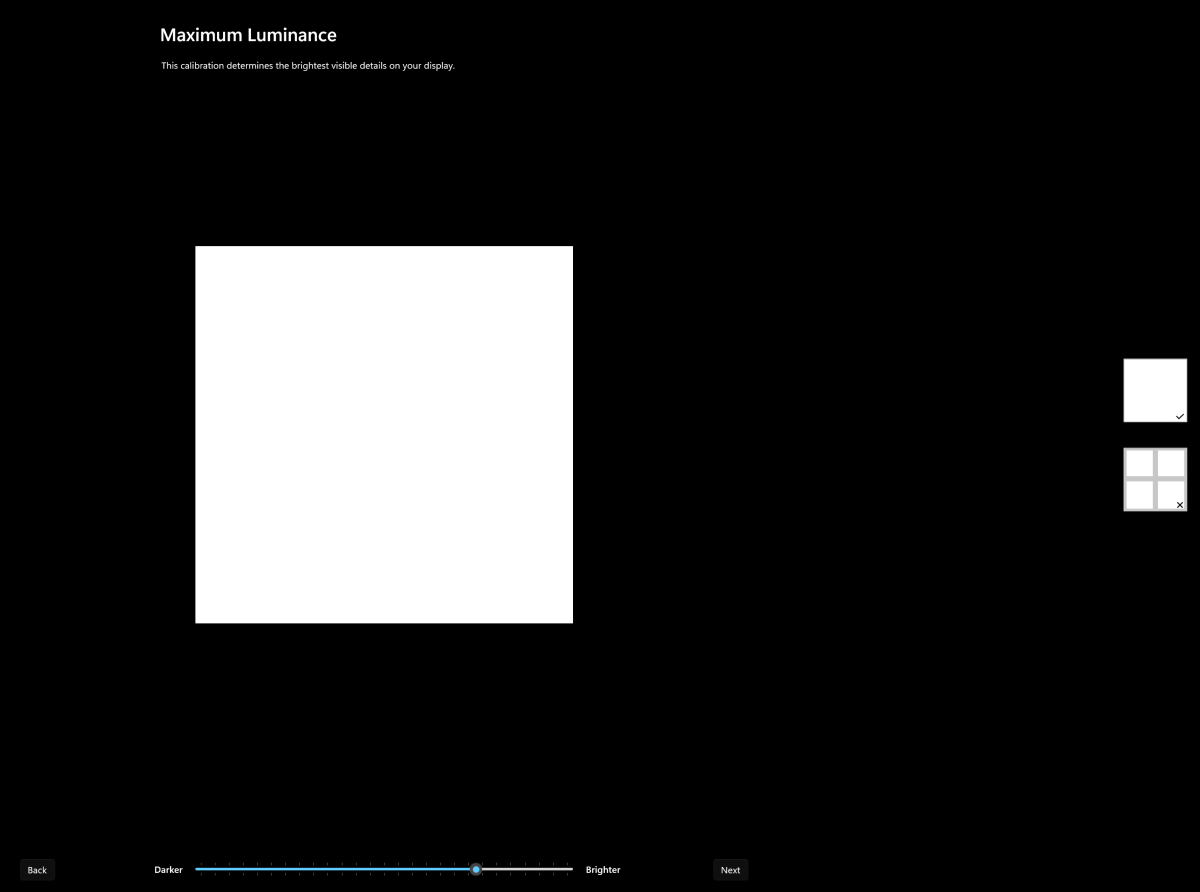
Mark Hachman/IDG
Repeat this step, just setting the maximum luminance. Again, adjust the slider until the window pane disappears. The emphasis here is on showing the brightest details your HDR monitor can display.
Set full frame luminance with Windows HDR Configuration app
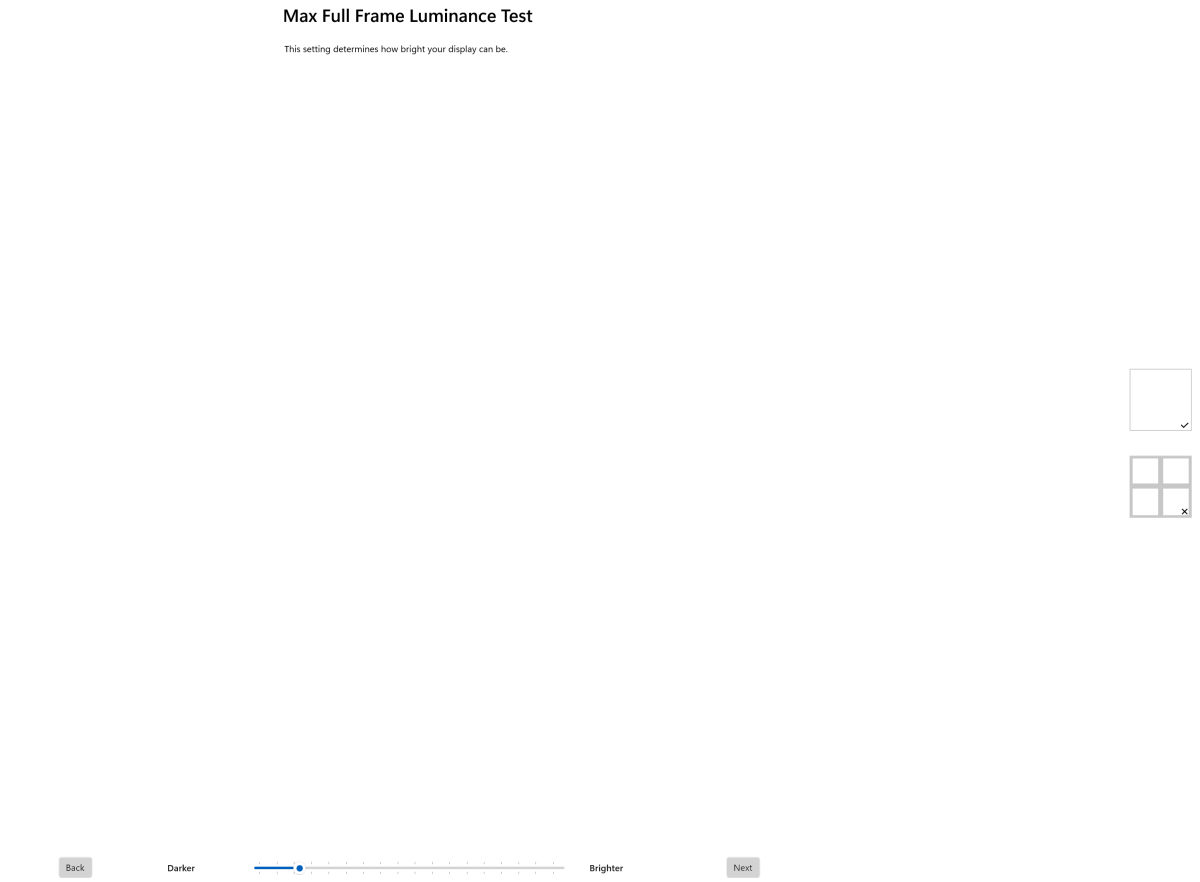
Mark Hachman/IDG
By now you should be moving quickly through the HDR Configuration app. The only difference here is that you are adjusting the luminance of the screen as a whole.
On some monitors, it doesn’t really matter. The Innocn 27M2U, however, employs local dimming – it uses a series of independent LED backlights that can be turned on or off. (This helps with contrast.) In this case, you can (hopefully) ensure that the screen is generating the same amount of light on the screen.
Adjust color saturation with the Windows HDR Configuration app
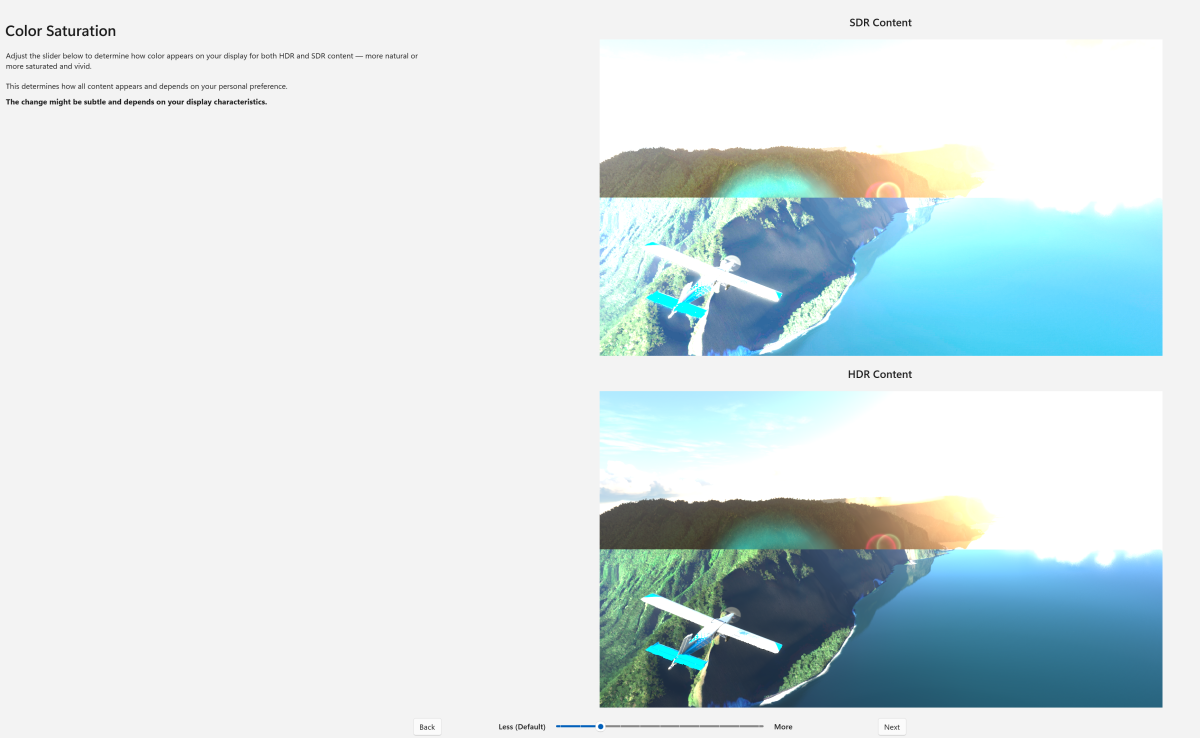
Mark Hachman/IDG
Here, you can theoretically adjust how colors will appear on your HDR monitor when HDR is on or off. This is extremely depending on your monitor, and on the three test screens we used, we could detect absolutely no difference when the slider was adjusted.
Review changes made to the Windows HDR Configuration app

Mark Hachman/IDG
Here, you will see what changes, if any, were made to the HDR video output using the Windows HDR Configuration application. (The only reason you don’t see any difference here is that we configured the display earlier and the changes, if any, were too subtle to see.)
clicking finish will save the color profile you have established through the HDR Configuration app.
Afraid that you messed something up? See how to delete this color profile
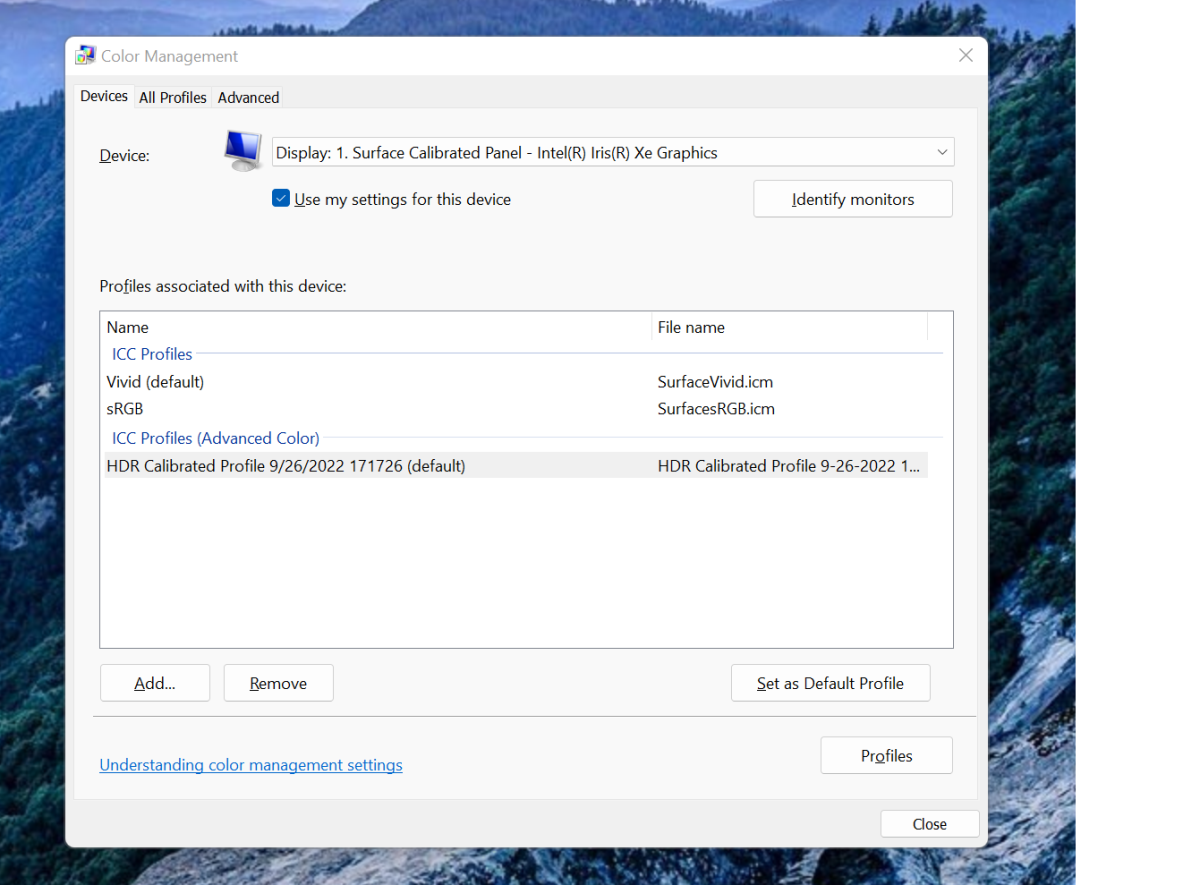
Mark Hachman/IDG
The new HDR color profile you just saved can be managed from the Windows Control Panel. Select the To start button type color managementand select the profile from the list of results.
You will notice that there is an “ICC (Advanced Color) Profile/sec” for each monitor. You can set this profile as default, or remove it completely if you don’t like the results. Note that you are free to create as many color profiles as you like for any screen supported by the app – you may want different profiles for gaming, watching movies, or anything else. Or not! You are free to experiment as you wish.